Tuesday, May 22, 2012

DIY Mail Organizer


Another quick posting. I followed this blog post for a Mail Organizer Tutorial. The only real difference between mine and this one is that the blog post gives instructions for two pockets and mine has four pockets. I didn't change anything other than the amount of fabric I purchased for the extra pockets.


I purchased the three types of fabric in the remnant section at Hancock Fabrics. Hobby Lobby also didn't have the same sew on labels as shown in the tutorial so I went for the clips and made my own labels by printing out the label and gluing them to a brown cardstock backing. I chose to put the labels on the side instead of the middle because I thought if something tall ended up in the middle it might cover the label. This is a great tutorial and it has really helped to organize my mail mess!

White on White = Washout

This will be a simple post. The problem I have with being a renter is always WHITE WALLS! I hate them, but I am forced to live with them. So what happens when you have white decor to hang on the walls? If you put white on white it washes it out and you might miss a lot of the detail and it might take away from your decor.

I found a way to not only make the white stand out, but made it look gorgeous too!

My guest bathroom upstairs is somewhat beach themed. So I have these two white-framed pictures with a shell and a sand dollar. I took the same idea as I showed in the video I posted a while ago with staining a few small boards of wood and gluing them together.

The difference in this project was that I wanted to add the aged sanded look without doing all the sanding. This was supposed to be a quick project, I really didn't want to put too much into a simple background for a wall hanging. So I took a paint brush and barely dipped the brush in the paint so it was pretty dry and just lightly swept it over the stained boards. This gave it the look I was going for with half the effort.

TIP OF THE DAY: The paint I used was purchased as a Pint from Lowes. Near their paint desk they actually sell paint that people mixed and then didn't want for a discount. I only paid $2.50!

Here was the result:


Lastly, I just screwed in a couple hangers and connected a wire between them to hang on the wall and measured and put two nails in the board to hand these two pictures. See...imagine what these would look like directly on the wall! Totally washed out.

Saturday, May 5, 2012

Decoupaging: Adding to Previous Project

So previously I posted a video about what I did with a few pieces of wood and created a nice Teal wall hanging that looked somewhat aged. Here is a picture to jog your memory:


So the original intention for this project was to use it as a wall hanging in my Guest Bathroom upstairs but the color was WAY off from the rest of the decor. I really love the way it looks so I hung it in my powder room downstairs and until yesterday it was just plain. It took me several weeks to figure out what to do with it. 

I was perusing Pinterest and came across my friend Chelsea's pins and saw an idea to Decoupage old scrapbook pieces. LIGHTBULB!

So I went to the HL and found three 4" x 6" wrapped canvas art boards.

Something similar to this

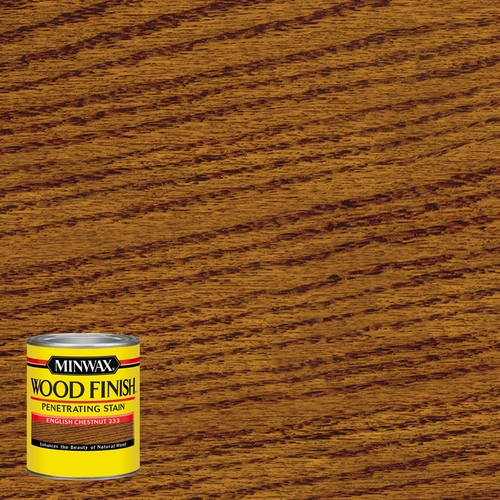
I took some Burnt Umber (Dark Brown) Acrylic Paint and painted the outside wrapped edges of the canvas so that it would look more finished when I was done. 

After that I cut some scrapbook paper the size of the top of the canvas. You might want to mark it and cut with a paper slicer because my canvas wasn't exactly 4x6" as advertised. 

I purchased a decoupage finish from the store. Modge Pog is a popular brand but when I read the instructions it suggested using another product on top of that product so that the finish wouldn't be tacky. Now...last thing I want to do is pay for TWO products for one project. This is on the cheap after all. So I decided on this product: 


which does everything I need it to do in one without the tackiness. DONE. 

So here is what you do: 

Step 1: Paint the outside edges of the wrapped canvas. Pick the color you want. I do suggest a neutral to go with the paper though. 

Step 2: After the paint dries, use a brush and brush your decoupage finish onto the canvas and a little on the paper. 

Step 3: Start with one side of the paper and sort of roll it onto the canvas. If you need to readjust, do it quickly before it dries too much and you can't move it. It's easier to do it this way than to just lay it down on the canvas all at once in case you miss your mark. 

**Optional Step: use the same color you painted with, in my case the Burn Umber, and paint the corners and edges  with a dry brush to give it a sort of aged, rugged look. 

Step 4: Give that about 10 minutes to dry and then brush the decoupage finish on TOP of your scrapbook paper. Go ahead and coat it over the painted portion too. It dries clear and it gives the painted portion the same shine as the rest of the project. Repeat this step at LEAST once more to make sure you can get the corners coated well so they don't peal up. 

Don't worry too much if the colors in your scrapbook paper smudge slightly from the wetness of the finish. It adds to the charm!

If you use this for a similar purpose as I did then here are some additional steps: 

Step 5: Buy some photo frame hooks similar to this one to screw into the back of your canvas for hanging. I used a triangle shaped one that was slightly smaller than this. 


Make sure to measure it and center it as best you can on the back of the canvas or it will hang all cock-eyed. If it is slightly crooked don't worry, again adds to the charm. COMPLETELY crooked is another story. 

Step 6: Hammer in your nail and hang!


Finished Product: 


Cost: 

Scrapbook paper: slightly under $1 with 50% HL discount
Decoupage Finish: $6.99 minus 40% off coupon so....(calculating)...$4.19ish
Canvases: $2.99 ea. Could have waited for 50% off sale but didn't wanna. I had no idea when they would go on sale and I just wanted to finish this darn thing. 

Total cost: just under $15. Sounds like a lot for those teeny things, BUT I have a TON of decoupage finish left to go decoupage NUTS and they make great gifts for Mother's Day because you don't have to use scrapbook paper, you can use any paper or even pictures. It's like a fun mosaic. Also, I have tons of scrapbook paper left for other projects as well. 

LASTLY:

I am going to velcro (so I can switch them out later) some little square pictures of Dylan or Justin and I to display on these pretty canvases. 


Wednesday, May 2, 2012

DIY Bar Shelving

Here's a story of an evolving bar. Almost 5 years ago we bought a wine rack that holds glasses and has 4 shelves to hold wine bottles. This is great until we started buying more and more liquor to make mixed drinks and soon enough we had no space on top for all the bottles. They were all spilling over onto other tables and counters.


Now this makes me sound like an alcoholic, but I assure you that is not the case, we just like variety and to have things on hand.

So when we moved to a new house we decided to add two shelves on the wall for the liquor bottles. Our challenge was that we needed it to be able to hold a lot of weight. Glass and liquid can be very heavy!

So we went to Home Depot and bought a couple of brackets that were rated high on the weight scale. I don't remember how much exactly, but over and above 50 pounds at the very least. Then we bought two 4'x12"x1" pieces of pine wood.


Using 120 grit sandpaper we sanded all sides. You especially want to get the ends really well because they tend to be very rough and it becomes difficult to get the stain into the "holidays" as my Dad always called the deeper holes in the wood. I try to avoid having to stab the wood with the paint brush. 


We chose this stain, although you can choose any stain you wish that would match your decor. You can also just paint it, but be sure to primer first if you choose to paint. I really liked the idea of seeing the wood grain with this and giving it a somewhat organic look that you can't get with paint. See my post on Paint Brush Cleaning to see how to clean your brush following the use of an oil-based stain should you choose one. 

There are a couple different options on how to apply the stain. Some use a rag and some use a brush. A contractor told me the easiest way to get an even stain is to paint it on with a paint brush and then take a rag and wipe the excess off after you are done with that coat. I used both methods in this project and he was right, the paint brush method was easier and more even. 

You want to sand VERY softly with a 220 grit sandpaper between coats (I don't remember why, I was just following directions. Google it or leave me a comment with the reason if you know the answer). The more coats of stain you use, the darker the stain becomes. You can really do as many as you like. I chose 3 for this project. 

Follow the directions on the can for drying time in between coats. 


After finally finishing the 3 coats of stain. I utilized a polycrylic protective finish to protect the wood. If you are sealing something that is not going to get too much use or will only hang on the wall 1-2 coats is probably fine. If you will be using it a lot, do 3-4 coats. This dries MUCH faster than the stain so once you get to this portion it will get done pretty fast. Since these are bar shelves and we will be taking bottles on and off the shelves a bunch, I chose 3 coats of stain per my contractor's advice. 

We then used shelving screws to hang our brackets and shelves onto the wall. Make sure you use a level, you don't want it to look crooked! 

FINAL PRODUCT: 


Thursday, April 26, 2012

Paint Brush Cleaning 101


In the past I have been the biggest idiot...or just lazy bones...about cleaning my paint brushes. I ruined several by not cleaning them correctly. Ultimately, I either had to buy another one or it made the next job I did much harder with a messed up brush.

How hard can this be? Well...it's not at all hard as long as you do it and I have a few tips that will help you to do it in such a way that your paint brush will seem as good as new when you do the next project.

If you are dealing with any water-based product or your typical latex paint you are going to have a pretty easy go of it. It cleans up pretty nicely with soap and water. Seems idiot proof (and it is) but there are a couple of things to keep in mind to make it easier on yourself.

Rule #1: Clean the brush IMMEDIATELY after you finish your project.

Don't leave the paint brush for a bit and then try and clean it. Clean it right away. Paint dries at different rates depending on a few factors, but the important thing is that you don't want the paint to dry and then be permanently crusted. Best way to avoid that is to wash it right away.

"Can't I just use paint thinner later?"

Yeah, probably, but I try to avoid it due to its toxicity and the extra work I would have to do later. Just do it right away and you won't even have to fight with it.

Rule #2: Follow the instructions for clean up on the product you are using.

These companies are really nice and try to make it easier on you. If they tell you to use something other than soap and water to clean your brush there is a reason. If you clean something oil-based with water you wont actually clean it correctly and you will run the risk of ruining your brush. They are giving you good advice, so my suggestion is to follow it, so don't be a lazy bones!


Water-Based

1. Rinse it out with water in the sink or with a hose. 

2. Add a small amount of soap and work it in with your fingers, fan the brush out to help get the bristles clean in the center. You want to focus on more than just the outside part of the brush. 

3. Rinse again and use your fingers to squeeze the water and paint out of the brush. Do that several times. 

This whole process should take less than 5 minutes if you do it right away. 

Oil-Based*

1. It will probably tell you to use paint thinner of mineral spirits, so put some in an old soup can, bucket or old coffee mug and let the brush sit in it for 15 minutes or so.

2. Rinse under water in the sink or with a hose. 

3. Use an old towel or t-shirt to wipe the brush. 

*Per contractor I know. 


Rule #3: Get the excess water out of the brush for quicker drying time.

There are a couple of ways you can do this:

A) Use all the might in your arm to shake it out. Hold the handle and act like you are going to throw it on the ground as hard as possible, but don't actually throw it. The water will fly off the brush. Do that several times.

B) Hit it back and forth against a dry tree, brick, piece of wood, etc.

Either way you will get the water out and it dries pretty quickly. This is especially helpful for avoiding a large water puddle underneath the brush or if you have to use it for a different project soon after.

Go forth and have clean, usable brushes!

Friday, April 20, 2012

DIY Chalkboard Menu for under $10!!!

So if you have kids or a spouse who is always asking what's on the menu for Breakfast, Lunch or Dinner you can do something like this. My husband's most common question in the house is "What's for Dinner?" I answer this question daily. So to save us both some time I decided to make a Menu board I can put in the kitchen to answer this never-ending inquiry. Of course this must be done On the Cheap or it's not worth doing...am I right, people? Yes...I am. 

Now you may be asking, "How is it faster to take the time to write it down than just answer the question?" Truthfully it might not be, but if I get in the habit now, when my kids are older and able to answer the question, I wont have to answer it multiple times for multiple people. 

Another reason I'm doing this is because I tend to get lazy on the quality of food I eat especially at lunch. I figured if I wrote down what I was going to eat for lunch that day instead of figuring it out when I was starving, I would be more likely to stick to a healthy meal than run out and get something not as good for me. Look at is writing down a daily goal. Anything to help me live a healthier lifestyle. Don't worry

So I went to the local Walmart (although not my favorite place, it is a cost effective place) and I purchased an 11 x 14" picture frame with a cool design I liked for $5. I might have been able to find something cheaper at Goodwill, but I may have had to repair it or spray paint it, so I opted for a new Walmart one. I also purchased this can of Krylon Chalkboard paint for $3.97. 

Total project cost: about $9


Step One: Remove glass and find a surface you can easily spray paint on that is well ventilated. Spray in even horizontal strokes. If you stay in one place too long it could create excess paint spots or drips which you don't want to have to fix later. 


Step 2: Wait for it to dry a couple of hours and then verify that you have enough of a coating on it so you have an even surface to write on. If you missed a couple spots, just add to it again using the same instructions in Step 1. 


It should look like this when it's finished and dry.


Step 3: Put the glass back in the frame, hang on the wall and enjoy! 

You can use this for anything, not just a menu...maybe a calendar reminder, to do list, or whatever fits your needs. 

Also, note that you do not have to use glass or a picture frame for this type of project. You can use plastic, wood, metal, etc. to spray on. The beauty of this chalkboard paint is that it adheres to almost ANY possible surface. I just chose this method for the aesthetic quality and I wanted to make sure I had a hard enough surface to write on with the chalk. 

I did not primer the glass before painting and I tested the wet chalk and it did not remove any of the chalkboard surface. Luckily if I have any problems down the road (which I doubt I will) I have the rest of the can to re-spray if needed or to just make another chalkboard...maybe for my daughter's play room. Oh the possibilities!

Tuesday, April 17, 2012

DIY Painted & Weathered Wall Hanging

Here is a tutorial on how to make a weathered wall hanging. You can use any color you choose really and you can use it for whatever the heck you want!


I'm not totally finished with it, so it looks plain. I will update later when I finally finish it.